Overview

  1. File management
  2. Web
  3. piQtility for Photos®
  4. Inter application integration
  5. For the Adobe InDesign user
  6. What's new


Edit photo

Download also our FREE "Tahoe2026" Wallpapers with examples of what you can do with piQtility!

How you could play with the 'add frame' function

  1. Choose or add photos on which you want to add a frame
  2. click the 'Edit photo' tab, select 'Framing' in dropdown menu.
  3. After that, you can modify the properties of the frame
  4. If you want to see a simulation of the frame, you can click the 'Simulation mode' checkbox under the photo preview.
  5. When you are satisfied about your previewed frame, you can proces the photo ('Step 4: Process!') and apply the frame to the photo.
Click Here For The Tutorial

How you could play with the 'rotate' function

  1. Choose or add photos on which you want to rotate
  2. click the 'Edit photo' tab, select 'Rotate' in dropdown menu.
  3. After that, you can modify the properties of the Rotate function
  4. If you want to see a simulation of the frame, you can click the 'Simulation mode' checkbox under the photo preview.
  5. When you are satisfied about your previewed rotation and background color settings, you can proces the photo ('Step 4: Process!') and apply the rotation.
Click Here For The Tutorial

Apply filters

  1. Choose or add photos on which you want to apply a filter
  2. click the 'Edit photo' tab, select 'Filters' in dropdown menu.
  3. Choose the filter that you want.
  4. If you want to see a simulation of the filter, you can click the 'Simulation mode' checkbox under the photo preview.
  5. When you are satisfied about your previewed filter effect, you can proces the photo ('Step 4: Process!') and apply the filter to the photo.
Click Here For The Tutorial

New filters in piQtility 10

  1. X-Ray
  2. Vignette
  3. Dots Retro
Look how to combine X-Ray and Vignette filter and notice how quickly you can make special effect.
Click Here For The Tutorial

With piQtility, creating a photo book (face book) has never been easier.

  1. Load the photo(s)
  2. click the 'Edit photo' tab, select 'Export faces' in dropdown menu.
  3. Define the space around the face: Padding.
  4. Define the aspect ratio of the new photo.
Not happy? Tweak the settings and reprocess your photos in no time.
Click Here For The Tutorial

Convert colors based on applied (ICC) color profile.

  1. piQtility can convert colour of photos based on ICC color profile.
    This little movie explains how.

    Why should you do this?
    Mostly photos from a digital camera are taken in 'sRGB' or 'AdobeRGB'. Those profiles have a wide colour gamut to reproduce highly realistic colours.
    If these photos need to be printed, that means that they will be converted in a smaller colour gamut before they can be printed because of paper, ink and print limitations.
    In this small tutorial we describe how you can convert a RGB image to a very narrow colour gamut of ISOnewspaper26v4.

    This function can be used to transform colour photos to black and white for example, if you apply the appropriate colour profile, for example: "Generic Gray" profile.
    4 rendering intents defined within the ICC specs:
    • Perceptual
    • Relative colorimetric
    • Saturation
    • Absolute Colorimetric
    Each method has a different approach to map colours, out of the gamut, into the destination gamut. For example how to map all colours from a wide gamut RGB into a (very) small IsoNewspaper CMYK gamut.

    Perceptual
    Long time the “default” method to convert photos. Colours that not fit the new gamut, will be converted to the nearest corresponding colour. The result could be that some colour ranges would very flattened, to avoid this the render intent will try to raise the contrast between them. But this can result in an image where some colours differs a lot from the original.
    Relative Colorimetric
    Aims to result in the most neutral conversion. Colours out of gamut, will be converted to the edges of the output profile. Dark, saturated areas can become flattened.
    Saturation
    Focus on maximum of saturated colour. Purpose: vector graphics not photos. If applied on images, often not realistic colours.
    Absolute Colorimetric
    Focus on inkjet print systems. The paper colour will be taken into account if necessary.
Click Here For The Tutorial

How to add a subtle warm glow making use of the "Add Tint" function.

  1. Select main menu: "Edit photo".
  2. Select function: "Add Tint".
  3. Set properties as:
    the color;
    gradient: 50% of the width; Angle 90°;
    render method: Blend
    Position: bottom/center

Render methods explained.

  1. Lighter: Will replace the darkest colors with your new color or photo/pattern.
    Result: Lighter image.
  2. Darker: Will replace the lightest colors with your new color or photo/pattern.
    Result: Darker image.

How to get the 50+ pattern images.

1. Select main application menu: "Settings...". 2. Click button: "Choose library location". 3. Choose root location for:
"MoonApp_SupportFiles" folder
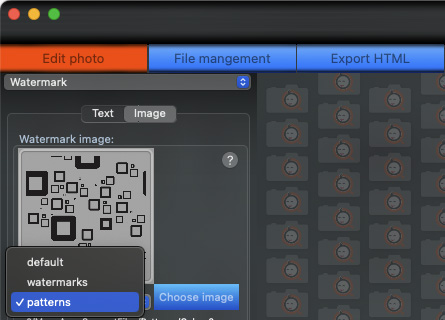
4. All pattern images will be stored in the "Patterns" subfolder 5. From there piQtility will access the patterns
See Fig. and chapter [5.]
Pattern location


Download & try